
De antemano os digo que las fotos las hice sobre la marcha en mi cuarto y muchas veces con luz artificial, así que no esperéis que todo sea maravilloso :)
Well my old friends, after certain efforts, it tie to go for a new SbS :) Ive chosen a Patroclus miniature from the infinity range. He will wear my faction colours, orange and grey. I hope this humble SbS will be usefull or inspirating your you.
Forehand i have to tell you that some of the pics taken for this tutorial were shot on my room, sometimes during night and with not the best artificial light, so not all of them are perfect. Sorry for that.
Vamos a ello /Lets get started
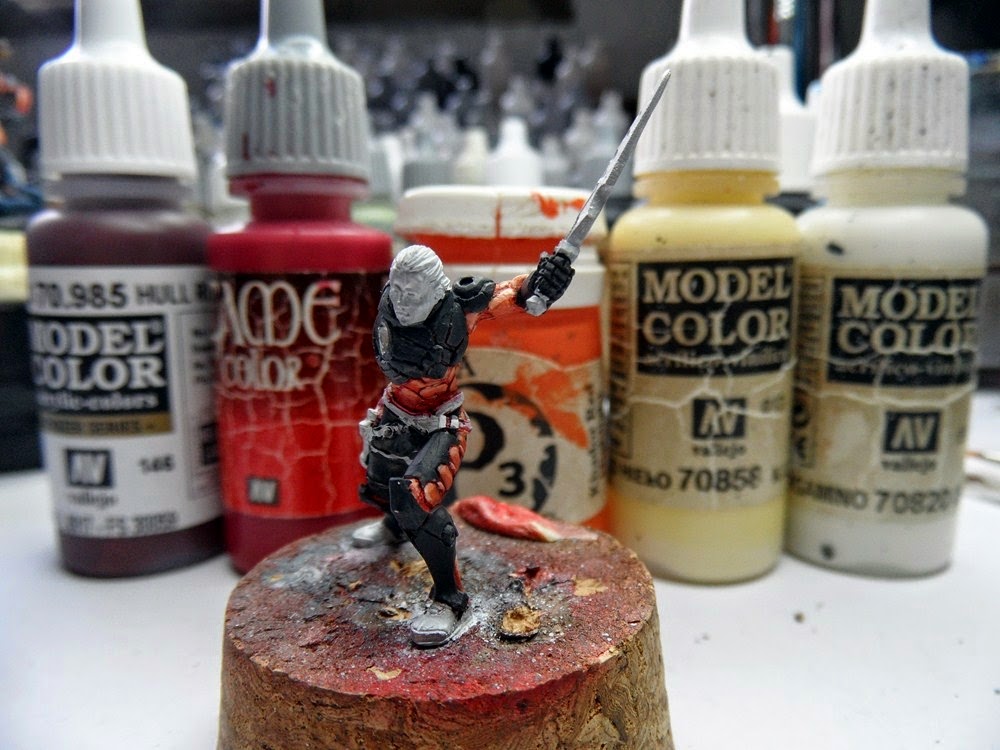
Paso 1: Base naranja y gris
Partimos de imprimación blanca. Para mi es lo mas cómodo y aparte, dado que vamos a usar naranjas, se hace indispensable. El gris base es gris alemán. El naranja, khador highlight de P3 (aunque es casi el mismo tono que el naranja brillante de vallejo). No se ha colocado el brazo derecho porque molestáis para pintar el pecho y la cara.
Step 1: Base colours.
I start with white priming, wich is my personal favourite and also it helps as we are painting oranges. The base grey is German Grey. The orange is Khador Highlight from P3 (but its almost the same as bright Orange from Vallejo). I havent placed the right arm as it would make painting the chest and face harder.


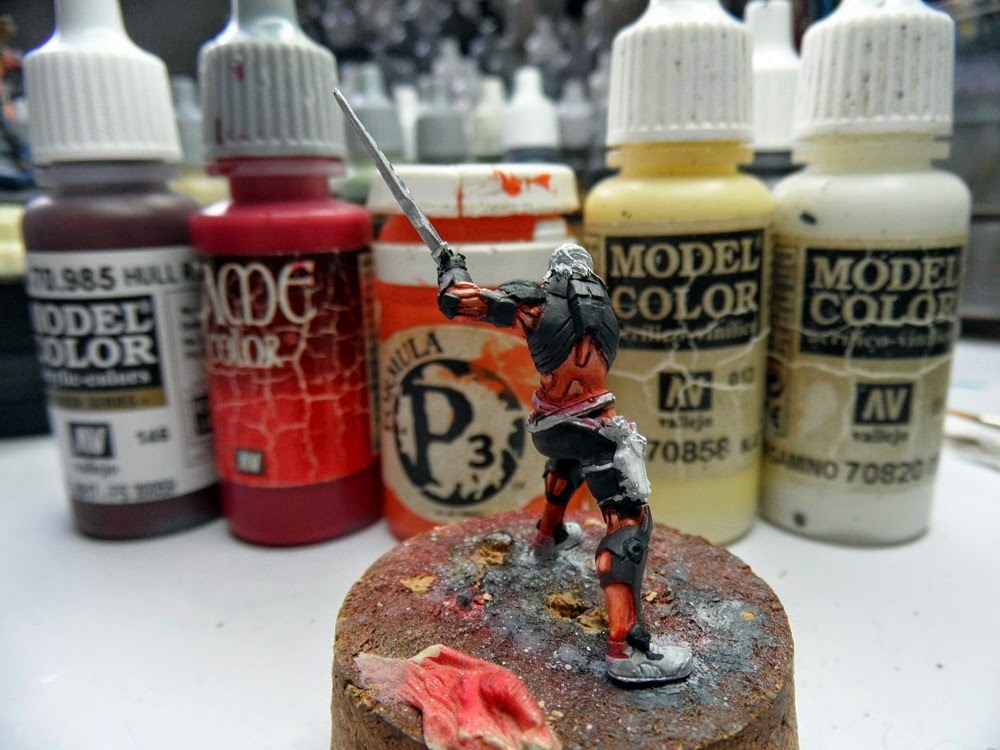
Paso 2: Sombreando y perfilando el naranja
Damos un primer lavado con una mezcla de flat brown y gore red. Así vamos marcando todas las estrías y áreas de la armadura naranja
Step 2: Shading and outlining oranges
We do a first wash with a mix of flat brown and gore red. This way we remark all the carvings and areas on the orange armour


Remarcamos con cuidado, con pintura muy diluida las estrías y zonas inferiores de la miniatura con hull red. Es un marrón rojizo bastante oscuro que da mucho juego.
Step 3: Deeper shadows
We remark carefully, with quite liquid paint all the carvings and lower zones of the mini with hull red. Is a deep brown-redish colour that helps a lot for this.

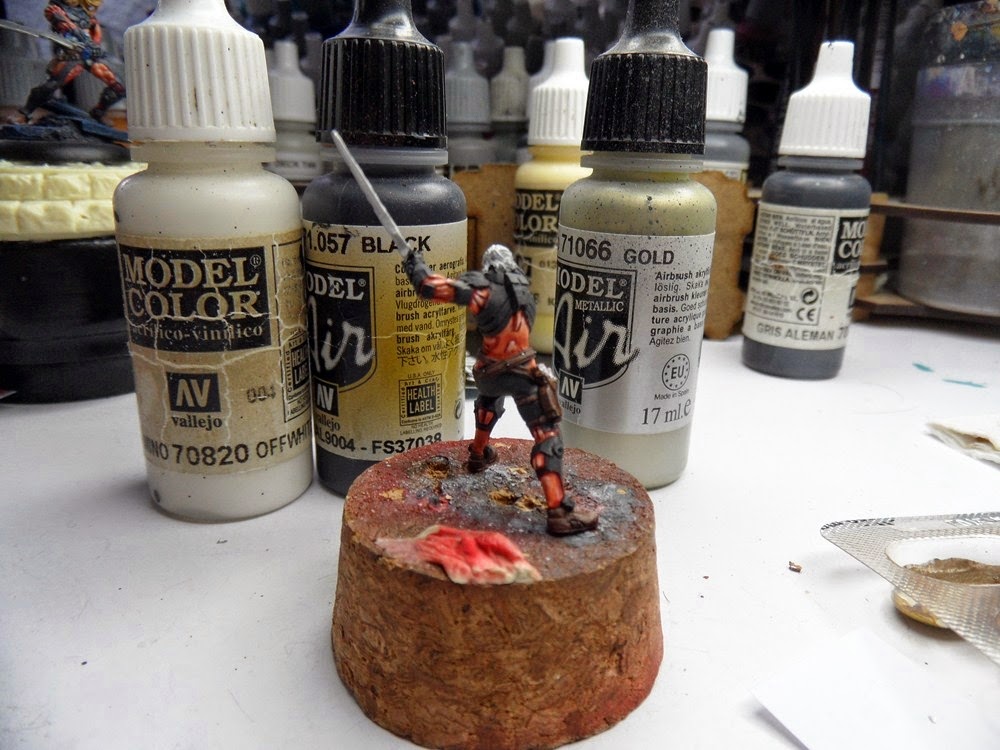
Empezamos y acabamos las luces. Tras las sombras comencé con el naranja base, al que fui añadiendo amarillo hielo. En las ultimas luces añadí blanco pergamino para resaltar. En esta foto no se aprecia, pero como no quede satisfecho con las luces, un poco después hice una mezcla con mas blanco para los últimos puntos de luz.
Step 4: Lights to the orange.
On this step i did all the lights for the orange. After the shadow i started remarking the spoils of the hull red with the base orange. Little by little i added ice yellow to the mix, and a little bit of white. Its not to see on this pic, but a while later, i wasnt pleased with the result, so i did a new mix with more white on it for the maximum points of lights.

Empezamos con el cinturón y la pistolera, con flat brown
Step 5: Leather
I painted all the base colour of leather on the belt and holster on flat brown


Vamos añadiendo a la mezcla marrón cubierta en varios pasos. En el cuero, de todas formas no me gusta subir demasiado hasta tonos claros, ya que no queda demasiado vistoso.
Step 6: Leather lights
We add deck tan to the base flat brown little by little. On this leather anyway, we wont go to very clear tons, as i dont like the "too shiny leather"effect.

Una vez iluminado todo el conjunto, hacemos un primer lavado con tinta sepia, y después otro en las zonas que queremos reforzar las sombras con una mezcla de tinta sepia y negro (perdón por la foto desenfocada)
Step 7: Shading the leather.
Once the whole leather is lighted, we do a first wash with sepia ink to get al the cravings marked. Later we do a second mix of sepia ink and black ink to darken the lowest zones to reinforce the shadows. (sorry for the blurry pic here)

Tras los lavados que han marcado las sombras, damos los últimos toques de luz al conjunto para unificar tonos, usando de nuevo la misma mezcla. Esto puede parecer repetitivo, pero haciéndolo un par de veces me gusta mas como queda el conjunto.
Step 8: Lights to leather - 2
After the shadows, we re-do some lighting to the whole leathers, applying the same mix again. It may look repetitive, but i prefer doing it twice, as i think that the final resul is more tidy this way.


En el cinturón hay una serie de trabillas y chapitas. Estas han sido perfiladas con tinta negra y luego iluminada con gold de vallejo air colour. Ni me preocupo de iluminar o sombrear (vergüenza!!!) pero es que son tan chicas que no se nota apenas.
Step 9: Belt details and maximum lights.
There are some metal parts and small details on the belt. Those are outlined with black from vallejo air model and then painted with golg from vallejo model air colour. I dont care much about ligthing and shading those (shame on me) as they are too small to see later.


Empezamos con la piel. Buscaba una piel clarita, un poco de bebe, como de niño mimado (a fin de cuenta en aleph si el cuerpo muere, le dan uno nuevo a la personalidad) La base es flat fleshtone con un punto de rosa y un punto de amarillo hielo.
Step 10: Skin
I start with teh base skin. I wanted a quite clear skin, a little baby-ish (anyway on aleph if the body dies, they give the character a new one). The base is flat skintone with a little of pink and a little of yellow ice.

Vamos subiendo luces, las primeras añadiendo mas amarillo hielo a la mezcla y las ultimas con blanco metido en la mezcla para los puntos de luz.
Step 11 Lights
We rise lights, the frist ones by adding ice yellow and the last ones with white on the mix for the maximum lights


Hacemos una mezcla de carne mate y flat brown y empezamos a marcar las sombras por debajo de los pómulos, cuenca de los ojos, parte inferior de los labios, orejas, y dado que estan bastante marcados, sobre la zona de las cejas, etc...
Step 12 Shadows
We do a mix with flat skintone and flat brown and we start marking the shadows on the eyes, under the nose and lips and under the chins, ears and, as they are quite marked, over the eyebrows, etc...

Se marcan los ojos con negro de vallejo air color (color utilísimo para mil cosas. Un negro opaco y muy liquido)
Step 13 Eyes
I outline the eyes with black from vallejo air colour. This paint is extremely usefull for this task, as its very opaque once dried and very liquid before drying.

We paint the eye in white and the we go for the pupil, first in black and then a smaller point of blue. Its not much to see on those pics, but we are aiming for a blue eyed blonde (quite Draco Malfoy look)


Empezamos a trabajar la parte gris de la armadura: Con el mismo negro de air colour perfilamos todas las grietas y estrías de la parte gris de la armadura. También mezclamos el gris alemán de base con un poco de tinta negra para marcar las sombras mas oscuras.
Step 14 Shades of grey (ahhaha)
We start working on the grey part of the armour. With the same black from model air we outline all the depressions on the armour. we also make a mix of german grey and black to mark the shadows on the lower parts

La iluminacón es bastante sencilla en la parte del gris. Vamos añadiendo mas y mas blanco al color base y vamos pintando placa a placa, llevando la luz a los extremos de las mismas.
Step 15 Lights to grey
The highlights are quite simpe here. We just have been adding more and more white to the base colour, and we have been focusing light on the edges of the armour, lighting one by one.


La base del pelo es german. camuflaje ocre naranja (si no me equivoco con el nombre) con un poquito de marrón mate.
Step 16 Hair
The hair base colour is a mix of german cam ocre orange (if i remember ok the name of the colour) and a bit of flat brown
Se aplica un par de suaves lavados de flat brown al pelo para marcar todas las sombras (hay que dejar secar el primero antes de hacer el segundo o se puede despeluchar la zona). Después de eso, se van subiendo los colores "pelo a pelo" (aquí se podría usar pincel seco, pero el resultado para mi gusto es demasiado sucio y desordenado) mezclando la base con amarillo hielo y finalmente llegando al blanco puro en varios puntitos de luz en el pelo.
Step 17 Hair´s shadows and lights
I did two soft washes of flat brown to mark all the shadows (i let the frist one dried before doing the second, thats important). After that, we highlights the base "hair by hair" (drybrushing here is an option, but the result is too messy for my taste). We miz the base with more and more ice yellow, then white. The final spots of light on certain points are done on pure white

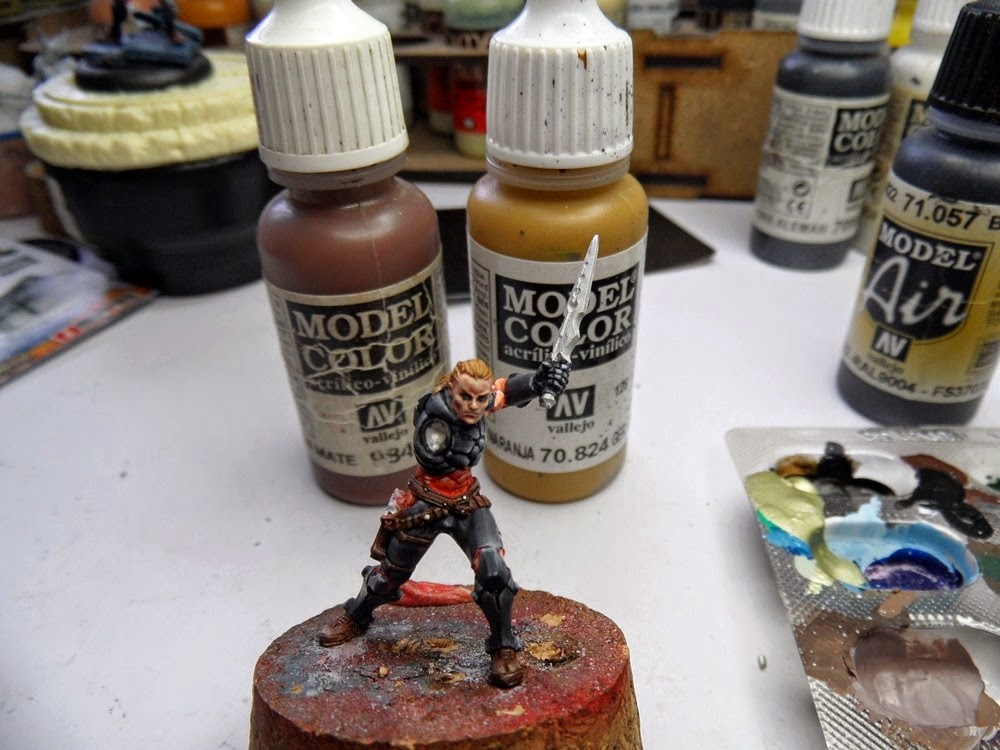
Ya es hora de poner el otro brazo, que se ha pintado igual que el resto de la armadura. En la foto se observa que ya están los naranjas terminados y los grises solo tienen la base.
Step 18: The other arm
Its the momento to add the other arm, that has been painted as the rest of the armour. In the picture you can see that the oranges are done and the greys are only base colour.

El color base de la espada es cromo de air colour (otro excelente color de esta gama para hacer metálicos sin grumos) con un poco de negro. Se oscurece con un par de lavados de negro y se ilumina dando algo mas de cromo a la mezcla de la base. Las estrías se han pintado primero con un lavado de morado y luego iluminado con un poco de rosa. No he quedado 100% satisfecho con la espada, así que creo que la retocaré luego.
Step 19 Sword
The base is a mix of chrome from air colour (another excelent metal colour) and black. The shadow are done by adding black to the mix and the lights use more chrome to the base. The carvings on the sword are washed on purple and then outlined with pink on some points. im not 100% satisfied with the sword, so im certain that ill overdo it on the future


Y este es el resultado final. No tiene peana ya que ira en una pequeña escenita. Espero que os guste :)
Step 20 Conclusion
This is the final result. It has no base as this guy will go on a small scene. Hope you will like it. ;)


Soon ill take better pics of the final work. I hope this SbS has been helpfull or at least a little inspiring. For me it was a little bit of hard work to be taking all the pics and by doing all the steps one by one, as im usually more anarchic on my painting, but its cool as experience. Cheers mates!!!! :D
Como siempre tu fuera de los esquemas oficiales y oficiosos, peeeero, como te ha quedado chulísima pues nada, se te perdona jajaja
ResponderEliminarMuchas gracias Rubio! Y si, lo de seguir esquemas oficiales me aburre... y ademas, doy por sentado que no voy a superar el pintado del encarte, asi que tiene doble razon para no hacerlo. :)
Eliminar